Showing posts with label challenge. Show all posts

Monday, July 25, 2016

1st Pull from the Inspiration & Challenge Jar

After getting the jar together I had to give it a try.  This is what came out....

Gotta say, these are not things I work with all that much.  So I guess that means the jar's working.  I had some ideas without needing the orange challenge strip so I opted to ignore it.  And a BABY theme???!  I almost never make baby cards. After I thought about it a bit though, I realized I actually have someone I can send it to soon so that's like icing on the cupcake!

For the colored pencil technique I opted to color a stamp.  When playing around with my pencils a while back I found that you can soften them with baby oil.  How cool is that??!  Here's one of the stamped images I colored and what it looks like softened.


This is the finished product.  Not my favorite card ever but I think I can live with it.  It has banners and brads.  Used colored pencils and is a baby theme so I successfully completed the challenge.


If you're feeling up to it, I'd love to see your take on my challenge pull.  Post links so I can go check it out.  If you do play along, the "blog hop" challenge can use any challenge from any blog you follow.  Please make sure to give links for that too.  I'd love to find more blogs to check out.

Have a fabu day!

P.S.  My pics are not very pretty.  I'd like to find a photography class to take to be able to use my camera and do better quickly.  If you know of any, please let me know about them.

Sunday, July 24, 2016

Inspiration & Challenge Jar

I finally did it.  This is something that's been banging around in my head for a really long time now but I've just never taken the time to do it.  Part of it was figuring out HOW I wanted to do it and also the idea of making all the lists....  Well, even to a professional list maker such as myself, it was a little daunting.  I have no doubt I've missed or forgotten something.  But the good news is that I can always keep adding to the lists and the jar.  To make sure I don't duplicate stuff I went ahead and typed it all up.  I'm hoping that'll save some hassle down the road.

The idea is to have a large variety of ideas or products or challenge themes all mixed up in a jar and pull out 3-5 slips.  Then you have to create a card using just the items or concepts on the slips.  This should be a really neat way to get out of a rut or challenge myself.  Which are two situations I find myself in much to often lately.

I decided to color code my slips.  This will make it easier when I'm pulling them out.  Pink for techniques to use, yellow for products or items to use, orange for challenges and green for theme.  This way I'll pull one green, and however many of the others I want.  If I only want one challenge I'll pull one orange but maybe multiple of the yellow to use several products.

I have one of those super sized pickle jars from ages ago. Until a few minutes ago it had all kinds of strings of beads in it.  Now it's got all kinds of cool 1" by 4 1/4" strips of paper with writing on them in it.  They could go into a smaller jar for sure.  Or any other kind of receptacle for that matter.  It might even be kind of cool to put each color into it's own jar.  But I like the idea of being able to put my hand in and swirl them all around until I pick one.

I made sure to make extras of each color so it'll be fast and easy to add more as ideas come to me.   Inspiration & Challenge Jar list    I'm not thrilled with the way Google Docs changed this up but it's still at least got all the items noted.

I think I'll probably also decorate the jar at some point but for now, I'm pretty happy to have finally gotten this much done.  If you've got suggestions for the list or easy decorating ideas send them along!

Have a fab day!


Thursday, October 18, 2012

It's Hip to be Square!!

I was asked to participate in a "Hip to be Square" blog event hosted by Lisa Swift, Remember The Good Times.  I was so delighted by this because it gave me just the push I needed to create a layout using my "handmade/stitched" paper.  All the details of my "handmade/stitched" paper can be found here.

Here's the layout.  I'll share some details about it after the photos.
Because my background paper was so busy I wanted to make sure my photo was large enough to not be overwhelmed.  I also tried to keep the embellishments to a minimum so the focus stayed with the photo.  This is a favorite of mine from the Friday night, casual get together we had.  Julie, on the left, Kelly, on the right, and I were like the three musketeers in high school.  Constantly at each other's house, wearing each other's clothes and just generally having a good time together.  This picture reminds me of that.
I created a tag to put my journaling on.  I hadn't quite decided what I wanted to say yet so it's still blank.  The tag slides in behind the photo to the backside of the layout.  This is for several reasons: 1) I didn't decide I wanted to add a tag until after I'd already adhered the photo down and 2) it was the only place or way left to add a tag after I'd adhered the photo.

Here's how I did it:  - lick and close my envelope
- measured the width of the envelope on the front of the layout and used a craft knife to cut a slit just a little bit larger
- trim off a portion of the envelope so it was as long as I wanted
- adhere the envelope on back of layout so the open end lines up with the slit in the layout
- to make sure there was additional strength as well as to make sure there wouldn't be any issues when taking out & inserting my tag I also added some scotch tape near the slit and on the sides.
- I also made my tag out of chipboard for extra sturdiness

If you'd like to see more "handmade/stitched paper" check out my blog post on Oct 16.

Supplies: Crate Paper 6x6 Paper Heart Collection pad, Core'dinations cardstock, Making Memories rub ons, Heidi Grace designs/Fiskars paper flower W/ brad, 7 Gypsies chipboard letters, Spellbinders dies for labels, washi tape unknown, Ranger TH Distress Ink

Monday, October 8, 2012

Where do you go??

I'm looking for new places to visit.  Online at least.  Since I've reduced the number of classes I teach each month I hope to be able to participate in challenges and get inspiration from new places.

So if you've got a favorite site for creative inspiration or great challenge sites please post a comment and let me know where to go.  In a nice way of course.  ;)

Sunday, May 13, 2012

Papertrey Ink: MIM #65 & PTPH Make An IMpression

It's been ages since I've been able to play along with any challenges.  But I was able to create a couple of cards this afternoon and did so with a couple of challenges in mind.

Here's my creation for Papertrey Ink's Make It Monday Challenge #65
We were to create a background with paper scraps.  This is actually something I do a good bit of so it was right up my alley.  What I don't do often is shabby chic a la Melissa Phillips.  That's who I was thinking of when I was making this.  Don't think I came anywhere close to her gorgeous shabby-ness but I do see things that remind me of her.  The fabric flower with multi layers, the inking, the tiny little hearts from her Tiny Tags dies and the pins.  I'll leave the sentiment off until I decide what to use it for.

This is for Papertrey Playhouse's latest challenge - Make An Impression
Mary challenged us to use a PTI Impression Plate on our card.  I chose to deboss rather than emboss my card front.  No particular reason other than it was the opposite of what everyone else was likely to do.  :)   I stayed with the Just the Ticket product line and used the ticket die and stamps as well.  And to add a little more color and tie in with the stars in the oval I Die cut Spellbinders stars to tuck around the tickets.   I may just hold onto this for Mel's birthday in a few weeks.

If you're stopping by from the MIM blog hop, consider participating in the Playhouse's challenge too.

Have a great day!!


Wednesday, April 25, 2012

Card Making & Coloring...

I got a chance to play a little in my office yesterday.  Thought I'd share them here.

I created 3 different cards yesterday.  A thank you to one of my derby sisters and a set of cards that's a little harder.  We found out last weekend that a high school friend of our son who is also a neighbor was in a car accident.  This young lady broke her back and is still in the hospital.  I can't even imagine what her parents are going thru.  And though we don't know them all that well I wanted to offer our support.  I'll get these signed by Mel this evening and go leave them on the porch.

Here's the one for her folks.
Supplies: Patterned Paper - Basic Grey, Stamps - PTI, Die Cut - PTI, Coloring Medium - Copic (inspiration and coloring  from Debbie Olson)
I didn't want to include any kind of get well type sentiment on Miranda's card.  With not knowing her condition or the prognosis it just didn't feel appropriate.  And I wanted it to be bright and happy.
Supplies: Patterned Paper, Stamps, Die Cuts - PTI, Ink - Paper Co, Button & Floss - unkn, Glitter Pen - Spica
I also created this to work for one of the recent Papertrey Playhouse challenge.
And finally the thank you for my derby sister.  I tried to color it as much like her as I could.  I even included homage to both of the derby teams she plays on - the Bad News Beaters & the Tent City Terrors.  I hope she enjoys it.
Supplies: Patterned Paper - HGD, unkn, Coloring Medium - Copic,  Stamp - American Art Stamps

That's if for now.  Still trying to get pics of the layouts I did for the upcoming class at Paper Vineyard.  Look for them as soon as I can.

Have a beautiful day.

Thursday, April 12, 2012

Papertrey Playhouse Mixed Sets Challenge!

Slowly but surely I'm trying to get back to crafting and creating.  One of the ways I'm trying to do that is by participating in more challenges.  There are several over at the Playhouse I'm looking to create for.  This first one is the Mixed Sets challenge.  I love the idea of mixing stamp sets to get more creative options.  I also grabbed my 365 Days A Year perpetual calendar to see what special days were coming up in my family.
I hope my Grandma Jean will like this one.  I'm sure it'll be a shock since I can't remember ever sending her a birthday card in the past.  That perpetual calendar is already coming in handy!

This one was quick once I decided what I wanted to do.  I love the Framed set for so many things.  One of the little houses from Love Lives Here fit perfectly in the opening.  I used the little grass and flower images to add to the scene.  An embossed cloud and sentiment from Birthday Bash finished it off.

I hope to make cards to post for the Stamp on Patterns challenge and the All About Babiess challenge too.  I hope you'll join us and create and post to the challenges.

Have a great day!

Thursday, March 15, 2012

Aaaaaaannddddd.... We're Back!

Having been out of my office and away from all my lovely crafting goodies, it's been more of a challenge than I'd've thought to get back into the groove.  What to do??

How about catching up on some extremely overdue design team challenges??  I was hopeful that having parameters to stay within would jump start my mojo.  With that idea in mine, I actually created 2 layouts last night and am really happy with them.


Here's the first sketch I worked with:  
I chose to turn it upside down and came up with this:

Sorry for the washed out look.  I took it outside to photograph.  It's brighter in real life.  :)
One thing that I really liked about taking on this challenge is that I actually created layouts!!  It's been such a long time since I've done that.  And I made my first Kaytey layout.  How can you not love that face??  

Notes: 
- With so many colors in the smaller photos, I elected to highlight the colors in the large, focal photo and not worry about the others.  
- I zig zag stitched each layer of patterned paper and cardstock together for texture and small pops of each color.
- I like how the ribbon on the heart and the photo help tie (punny, huh?) the two together and helped move your eye thru the layout.

Supplies: Cardstock - Core'dinations, Bazzil, Patterned Paper - KI Memories (Sweet Life collection), Ribbon - Offray, Chipboard Heart - Jenni Bowlin Studios, Small letters - Prima, Large Letters - QK Blossom cut from PTI coaster baord, Tiny Tags - American Tag Co, Paint - Delta, Safety Pin - UNK

Here's the second sketch: 
and the results:

My first derby layout!!  These photos are from the day I broke my ankle, obviously BEFORE I broke it.  :)  I love this shot of Mel, Bret & I.  I've already said this could be our Christmas card photo this year and it was only February!  The other pictures show me (upper left) blocking the jammer, (upper right) delivering a good hit and knocking the jammer down and (lower left) hanging in with one of the guys on the track.

A few things to note about my version of the sketch:
- I opted to change the sizes of my photos a little to better fit the pictures I had
- Create your own embellishments.  Yep, we've heard this for ages but sometimes we forget about it.  And creating your own embellishments doesn't have to be involved or complicated.  For example - the two "tapes" I created for this layout.  The "Support Local Roller Derby" tissue tape was made with an image downloaded from the internet, adding a black border around it and then lining it up end to end.  I used white tissue and double sided tape and printed the image onto it.  You can find the tutorial that inspired me here.  There are so many possibilities for this.  
- The other "tape" I created is the AZRD logo tape in the upper right corner.  I lined it up the same way and simply printed it on cardstock.  Neat touches that were simple, fast but had cool, personal impact.
- I die cut lots of little stars to create another custom tape look.  To make it more interesting I popped them up on foam squares.  Just a neat way to give some dimension to my "tape".

Supplies: Cardstock - Core'dinations, Bazzil, WorldWin, Title - Grapevine Designs, Patterned Paper - Fancy Pants, Die Cut Stars - Spellbinders, Quickutz, Rhinestones - Kaiserkraft, Labels - Dymo

You'll be able to see both of these in person at Paper Vineyard after the 24th.  Join me for Copic Coloring that focuses on Pallet Blending that day.  :)  

Here's hoping this jump start is successful!  I'm grabbing lunch and then I'm pulling out my markers!  

Have a fabulous day!!

Tuesday, January 17, 2012

Paper Vineyard DT challenge for today

With the holidays behind us, the PV DT is back, hard at work creating projects to inspire and delight.  Our challenge for Jan 17 was to create a Thank You card featuring an Impression Obsession stamp.  The stamp that was in my package of goodies was simple but elegant.  Kind of a perfect combination for a thank you card I think.

Here's the card I created using it.  I used the beautiful Authentique Gathering Collection from the Nov DT kit.
There was a tag included in the kit. I liked it but the text  on it didn't work for the challenge or was something I'd be likely to use in the future.  So, like any crafter, I opted to alter it.  :)  I used my craft knife to cut just inside the frame of the existing text.  Then I backed it with a scrap of patterned paper from Simple Stories and stamped my thank you sentiment onto it.  Simple, elegant and really fast to put together.  I may have to see  about making more to create a set to have on hand.  Or even to put together a gift set. You always seem to need something like this when you don't have the time to create it.

One other interesting note:  see that orange dotted paper?  That's a little bit of Crate Paper that matched this line perfectly.  So a little reminder, when you get new paper pull out some of your older favorites and see how they work together.  Get more bang for your buck doing this.

If you'd like to recreate this here are the measurements. Card base is A2 kraft.  The patterned paper base is 4 1/4 x 5, the blue patterned block is 3 1/4 x 4 1/4 with a second pattern sized 1 1/2 x 4 1/4 matted and stitched on top.  I use a zig zag stitch with deep orange thread to stitch the 2 patterns together and a cream thread with a straight stitch around the edges.  Tag was simple inked after alterations.  There are lots of ways to attach ribbon to the tag. This time I chose to simple thread the orange & blue thru the hole and then tie them with the 2 colors of twine in a bow.

Friday, November 11, 2011

PTI MM #40 Reverse Applique

This week Heather Nichols shared a video about reverse applique for Papertrey Ink's Make It Monday series.  Since I'm a die-aholic this was one I had to participate in.

I've had these cute little cloud dies for a while now but haven't used them.  For some reason they were crying out to be used for this challenge.  I paired them with the Enjoy The Ride die to create a charming scene perfect for a congrats card.  This one will go with a few car care goodies I want to get for my niece who just got her first car.

Other PTI goodies used include: Think Big Favs #5, Love Lives Here, Enjoy The Ride stamps, bitty dot and distress dot paper.

Saturday, October 29, 2011

Papertrey Ink MIM - Brayered Impressions

Papertrey Ink's latest Make It Monday challenge, presented by Betsy Veldman, was to brayer ink over an embossed panel.  My brayer is in pretty bad shape so I just went old school and did direct to paper with my ink pad.  I played with several different impression plates and inks and this is the one that became a card.


I used the Animal Prints Impression Plate which I haven't played with yet.  I also elected to use several other die cuts - the Heart #7 by Accucut & the Zelda alpha from Quickutz (another rarely used item) - to keep it simple and show off the embossing.  The inside has the remainder of the sentiment.


The sentiment is from Wonderful Words Additions and Tiny Treats: Valentines.
This was a really fun technique and one I want to remember to use more in the future.


One more creation from last night finally put a favorite colored image onto a card.  I wanted to really highlight the colored image, after all she's the rock star.  One thing I really liked is the paper on the bottom of the card - the design really reminds me of bearings. 

Tuesday, October 25, 2011

Paper Vineyard "Joy of the Journey" Challenge

I had fun creating this card.  Sometimes it's nice to just let the products speak and see what they say and where we go.  This one was telling me that I don't always have to leave products just as they come.  Here's what I mean.

This journaling card was included in the DT package.  It was very nice just as it was.  And there's lot's that could be done with it.  What I chose to do with it was to die cut it and use it in pieces.


Using a one of the Ribbon Tags Trio 3 dies from Spellbinders I singled out the large "JOY" to be my sentiment focus.  I trimmed out "bring" from the rest of the sentiment to create a new phrase, one that fit my style and creative idea better.

A few other things to note about this particular card: 
- the little brown bag that some of the smaller pieces of the DT kit came in just seemed to cry out to be used.  It was a typical kraft color but had a waxy type surface. I die cut it with more Spellbinders dies. Sooooo perfect for scrunching!  Love the shabby, vintage-y, messy look of them. 
-  there was a little bit of tulle in our package too.  I thought it would look really pretty and soften the paper flowers sticking out of the top of my flower pot.
- I stitched the dark brown Core'dinations to my Reminesce patterned paper.  And I added a little more stitching in the upper right corner for more texture.

I've been working on building my stash of cards that I can just grab and write a note in when I need one on short notice.  Because of the non-specific sentiment this one will be a great addition to my stash.

Speaking of adding to my stash - Paper Vineyard has everything in the store on sale for 25% off!! That's a great deal to help you add to your stash and make it easier for the store to make the move next door.

And speaking of moving - if you're on the West side, another one of my favorite stores, The Creative Quest, and where I often teach, is closing.  Get 30% off everything in the store.  Look for a new incarnation of this store in Dec in the little house right next door.

Sunday, October 23, 2011

Sneaking in Under the Wire....

Recovering today from the big 4 yr old birthday bash yesterday and Paste Eater's Night right after.  Football, sadly, wasn't all that exciting.  I managed to get a card created that incorporated 4 different challenges.

Challenge #1 - MIM with Papertrey Ink was to do a card with multiple mats & framing. 
                      This one ends in just an hour or so.
Challenge #2 - Papertrey Playhouse challenge to use stamps that haven't seen ink
                      This one was from September 14 that I didn't get to play along with.
Challenge #3 - Papertrey Playhouse challenge to use dies that haven't cut paper 
                       This one was from September 28 and I didn't get to play along with it either.
Challenge #4 - Papertrey Playhouse Season of Change photo inspiration
                       This challenge is still up if you'd like to play along.  You should see the photo - so pretty but makes me happy to be in the southwest without snow!


I pulled out my Mat Stack Collection stamp sets & dies.  I've got several of them but just haven't used them all that much.  I figured they were perfect for Dawn's multi-mat & frame challenge and also fit perfectly with Dana's September challenges.  Then all I needed to do was to incorporate Victoria's challenge. The first thing that stood out to me from the photo Victoria posted as inspiration were the colors.  So I kept it simple with red, orange & white.

Supply list: all items PTI unless noted otherwise - Mat Stack 4 collection stamp & die (orange herringbone), Mat Stack 2 collection stamp (red flourish), Mat Stack 1 collection stamp (leaf & acorn), Falling Leaves (sentiment),  Linen/Canvas impression plate, seam binding - United Ribbons, orange cardstock - Core'dinations, card base & ink - The Paper Company

Tuesday, October 18, 2011

Paper Vineyard Authentique & Favorite Tool Challenge

I've been hearing a lot about Authentique but hadn't been able to see it or play with it.  So I was really delighted when I saw this challenge.  I was even happier when I saw the paper.  So very pretty.  Paper Vineyard has 4 of their collections in the store.  I'll be grabbing up more from the Blissful line as well as lots of papers from the Uncommon line.  They've also got Journey & Glowing.  And if those papers aren't enough to entice you into the store - EVERYTHING is 25% off thru the end of the month!

In addition to using the Authentique papers we were to highlight our favorite tool.  I'm so bad at following directions. *sigh* I couldn't choose just one tool.  I'm a total tool geek & believe that tools should make your crafting time faster & easier.  I NEVER seem to create anything without my Fiskars 6" trimmer, Zip Dry adhesive & Tweezer Bee tweezers.  And more often than not you'll also find Spellbinders Dies on my projects.  All of these tools do just that for me.


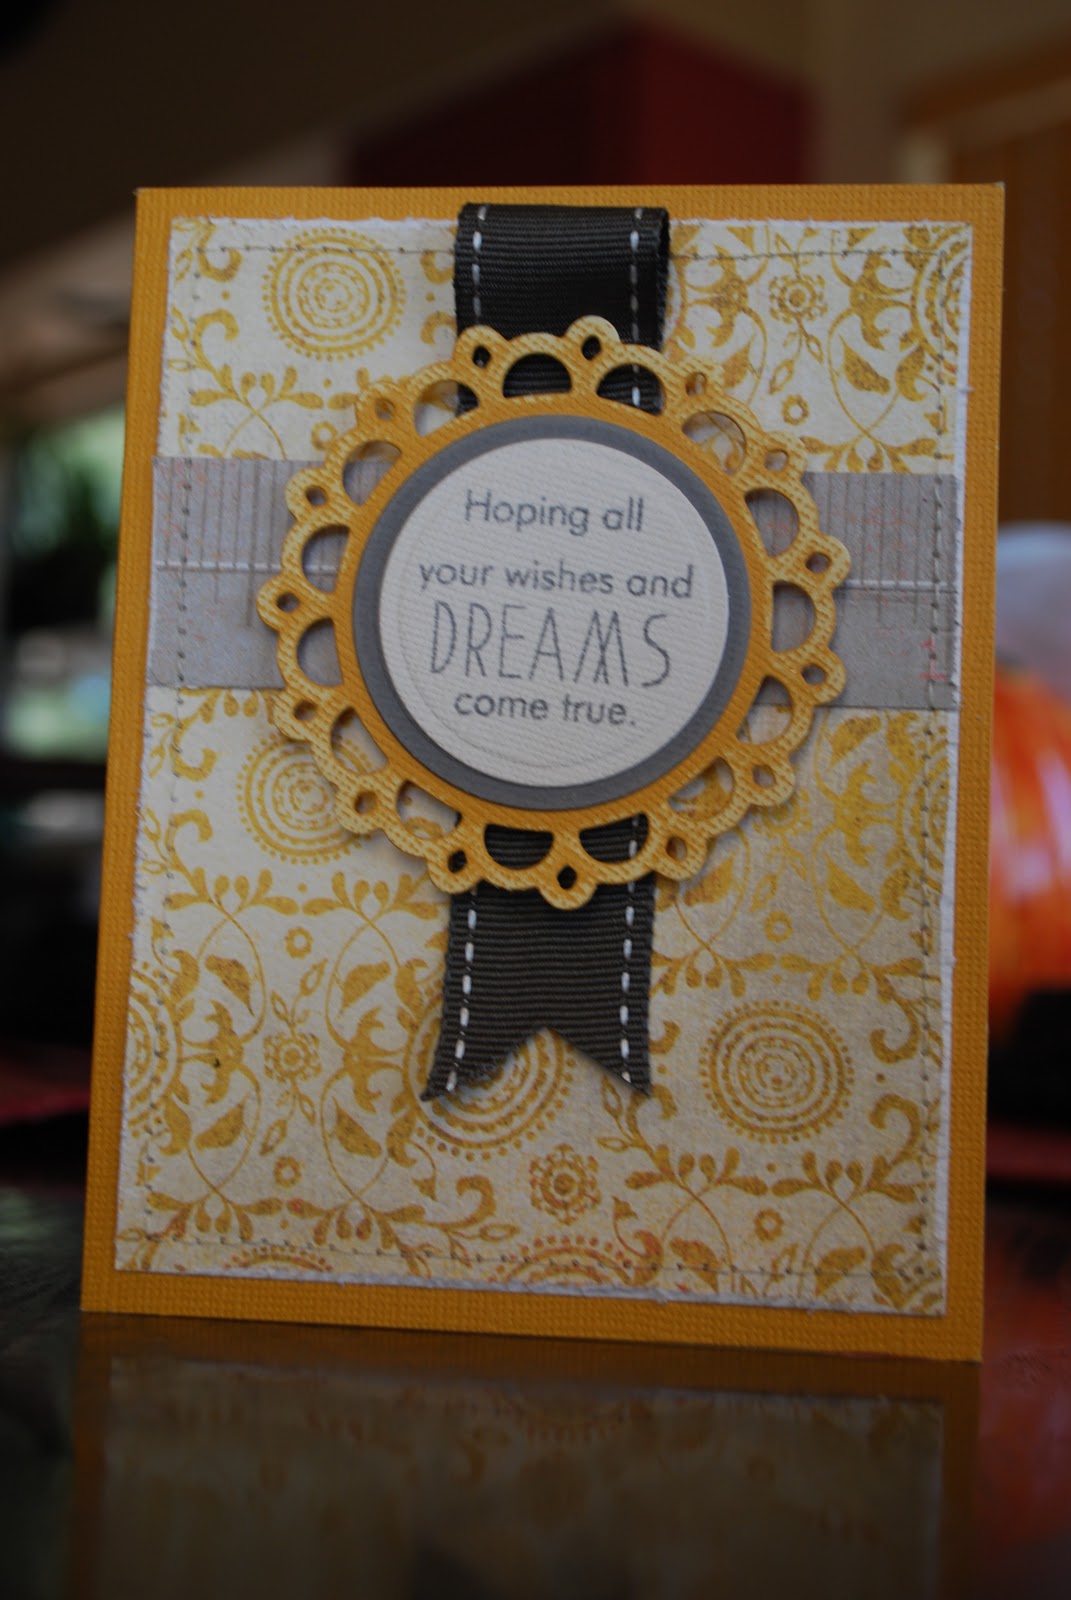
Here's the card I created for the challenge.  I had a Core'dinations card base (love those too!) that perfectly matched the Blissful line.  I distressed the edge of my patterned paper and stitched a strip of matching patterned paper near the top.  Some dark grey grosgrain (love how the stitching around the card is mimicked with the saddle stitch on it) under a die cut, embossed and sanded Picot Edge Circle.   I added a few more Spellbinder die cut & embossed circles on top of it with a stamped message.  I kept this one non-theme specific so I can use it for any number of occasions.  

Tuesday, October 11, 2011

Paper Vineyard Stampendous Challenge

Just a quick, partial post to share a Stampendous image I colored last night.  I haven't made the card part yet. 

One thing that has been such a help when I color is to find a real life image similar to my stamped image and use it as a reference.  I was very lucky to have just such a photo in my photo album.  On a visit to California in 2009, Mel & I stayed with some friends that took us to some wine tastings.  I handed my camera over to Sammy, their 9 year old daughter, and she got some AMAZING shots.  I love handing the camera to a kid.  You really do get images you would never have thought of.  Here's Sammy's photo.  Pretty awesome right??!

I love how strongly & clearly you can see the sunlight.  I love the colors that you see in the grapes.  However, with the light showing on the right side it wasn't perfect for the image I needed to color.


This is the Grape Vines image from Stampendous.

The artist is telling me that this image is darker on the right side.  How do I know this?  It's the lines that the artist has added on the grapes, all on the right side.  So what to do?

I flipped the image on the computer.  :)    Viola! Now I have the perfect image to help me color.


       Here's my colored image.


This image was a challenge because of the deeper tones in the grapes.  How to get that beautiful dark color with out just having dark blobs?  My answer was layering.  This is where Copics really outperform any other marker.
                                                   
              Here are the colors I used


I really am looking forward to coloring this a couple more times.  And can you imagine this done on shrink plastic to create a wine charm??  Put that on my to do list!

Tuesday, October 4, 2011

Deep in the heart of Texas

I've long wanted to participate in design teams but felt it would be a conflict when I was a sales rep.  So I'm very happy to have been able to join the design team at Paper Vineyard recently.  Each week Adriana asks that the DT create with a specific theme and/or product.  Today I'm showcasing the really cool custom chipboard state names offered through Grapevine Designs.  (If you haven't seen the stuff they're doing, you are so totally missing out!!)


When deciding what size/style of project to do, I pulled out a 6x10 album I started a while back.  The pages in it are just for me & just about me.  Some are serious, some are silly.  But this is an album for no one else but myself.  So I thought it was fitting to add a page to it about my thoughts and feelings about my favorite state.

I chose Texas for my state.  When I was thinking about what I wanted to do for my project I was thinking about all the things about Texas that I liked.  And I thought about how those things have impacted me throughout life.

This is a 6 x 8 3/4 piece of chipboard (I actually cut down an old Bisquick box to use.  Reduce.  Reuse. Recycle. at it's best as art materials)  I'll punch holes in the top (the blue side in this case) to add it to the album.  I like the unusual size and orientation - makes it a little more interesting when creating.  I recreated the Texas flag with patterned papers and then added a stitched heart and the lyrical reference to Texas.  The "Texas" is the intricately laser cut chipboard from Grapevine Designs.  I added a little acrylic paint to it and cut down some foam squares to pop it up.  This allows the state name to stand out against the background but not compete with it or be overwhelmed by it.  

I added my thoughts about Texas and how I've incorporated it's lessons into my life on the back.
Be sure to check out the Paper Vineyard blog on Tuesday to see what the other DT members have come up with!!

Monday, September 5, 2011

PTI MIM #31 - Create a background with non-background stamps

It's not very often that I'm able to play along with the Make It Monday challenges featured on Nichol Heady's blog.  With today being a holiday I was able to play along.  This week's challenge was to create a background with a non-background stamp.  I chose to use the Tag It's #3 for my background.

I really like that circle frame and need to use it more.  I stamped it in Olive green and added the tiny flower in Blossom Pink between each of the circular frames.

I also used the picket fence die cut and embossed it with the woodgrain impression plate.  The flowers peeking out from behind the fence are from Flower Fusion #3 with stems from Flower Fusion #4.  The "birthday" portion of the sentiment is from Wonderful Words Additions and the "happy" is die cut with Quickutz dies. A little seam binding, a tiny jewelry tag and some copper colored mini brads complete the focal image.

And as luck would have it, I have someone to send this to with tomorrow's mail.  It'll be late since today was my mom's birthday but she's like me, and happy to get cards even if they're after my day.  Let's me celebrate a little longer.  :)

Thursday, August 25, 2011

PTI August Blog Hop

I should know better.  But it seems I don't.  *sigh*  I wanted to try to participate in the August Blog Hop from PTI since I hadn't been able to in a while.  I had a few ideas rolling around and checked out what's already been posted.  That's where I should have known better.  Seems like I either didn't like my ideas anymore or saw several cards already posted that had a similar theme.  Back to the drawing board.  With limited time.  I must like working under pressure.
photo credit
So this is what I came up with.  I elected to take a more literal interpretation of this photo.  I'm not totally happy with it but it is what it is.

I used a lot of PTI goodness on this.  Pacific Vineyard paper to mimic the inside pattern and colors of the trunk.  Tea for Two label die, lots of items from the new Friendship Jar: Summer Fillers set, the original Friendship Jar jar & die, Text Style background on the tag that I did in place of the books in the photo, Birthday Bash Sentiments and Sending You to create the design on the napkin.

I can see several things that I'd like to play around with some more for a card with this kind of fold.  There's lots of potential for interactivity with the pocket on the bottom.  I need to play with this a little more.  I'm thinking it could be a neat way to present multiple gift cards for the holidays or a birthday.  What do you think?

Check out the card I created below for the Papertrey Playhouse Challenge just posted.  I hadn't seen the photo for the Aug Blog Hop and managed to still create a card that would work for the Blog Hop too.  :)


Wednesday, August 24, 2011

Papertrey Playhouse Same Tag Challenge

So often I have great ideas.  But they seem to be just a little too late to put into action.  I was so happy that this wasn't one of those instances.  Signing up for the next round of challenges on the Papertrey Playhouse challenge blog I tried to actually start thinking about what I wanted to do rather than waiting until the last minute.

For some reason I got to thinking about how one of my favorite magazine columns or articles is always where the same products are sent to multiple designers.  Between the ideas that never fail to make me think "why didn't I do that??" to seeing a variety of craft styles make a product work with their approach.

So I elected to use that concept for my challenge.  My twist on it was that I embellished a tag and sent it to everyone rather than them just having the "plain" product to start with.  I managed to not take any pictures or scans of the tags before I sent them out.  *sigh*  But each group member received a manilla tag with stitching around the edges.  I stamped the original Friendship Jar jar image off the edge and layered different PTI papers in a banner shape and circle.  I added some fabric tape over that and a little bit of lace tape near the top.

This is my creation using the "base" tag.  I didn't have anything in mind when I was creating these tags and hadn't even been able to work with  it until the Sunday night prior to posting the challenge for the group.  Once I did have a chance to play I knew I wanted to use the new Summer Fillers set.  I die cut and stamped the new pint jar on a scrap of grid patterned paper.  Since there were items already in place I did a good bit of creative masking to add to my images.  I did a little bit of coloring with my Copics on the single strawberry and straws.  I stamped a single word from 2 different sentiment stamps in this series to create the text in the Tiny Label.  I added some seam binding scraps and layered the tag over a doily.  The background paper is a sweet blue gingham from October Afternoon with stitching to match the tag.  This card feels summery to me.  Just a sweet something to send to a friend and recall summer memories.

I hope you'll consider playing along with those of us in the Playhouse.  Make sure to link your creation here or on the challenge blog so I can see it.

Monday, August 22, 2011

PTPH Fall Project

I'm barely squeaking in under the wire on this one!!  The most recent challenge over at the Playhouse challenged us to create something for the fall or one of the upcoming fall holidays.  I was originally thinking of something for Halloween but ended up with a general Happy Fall card.


I really like starting with colored card bases sometimes.  It just makes everything easier and faster.  That was certainly the case for this little gem.  A smidge of PTI patterned paper with stitching on the bottom with the notebook die on top.  The notebook die was cut out of a manilla folder (one of my favorite things lately).  I inked all the edges I could find with Antique Linen Distress Ink.  The pumpkins are from the Friendship Jar Fall Fillers as is the sentiment.  I added a little interest to them with one of the background stamps from Bitty Basics.  So fun to do that and really change the feel of an image - the dots make them seem more casual, happy.  (How do you know if a pumpkin isn't happy??)  The label die is from the Tea for Two series.  I inked up the image that coordinates with it and then just wiped off the ink from the text inside it.  Lots of possibilities when you think of how you can selectively un-ink an image.

The next challenge, hosted by yours truly, goes live in the morning.  Stop by to check it out and play along!