Showing posts with label creativity. Show all posts

Monday, July 25, 2016

1st Pull from the Inspiration & Challenge Jar

After getting the jar together I had to give it a try.  This is what came out....

Gotta say, these are not things I work with all that much.  So I guess that means the jar's working.  I had some ideas without needing the orange challenge strip so I opted to ignore it.  And a BABY theme???!  I almost never make baby cards. After I thought about it a bit though, I realized I actually have someone I can send it to soon so that's like icing on the cupcake!

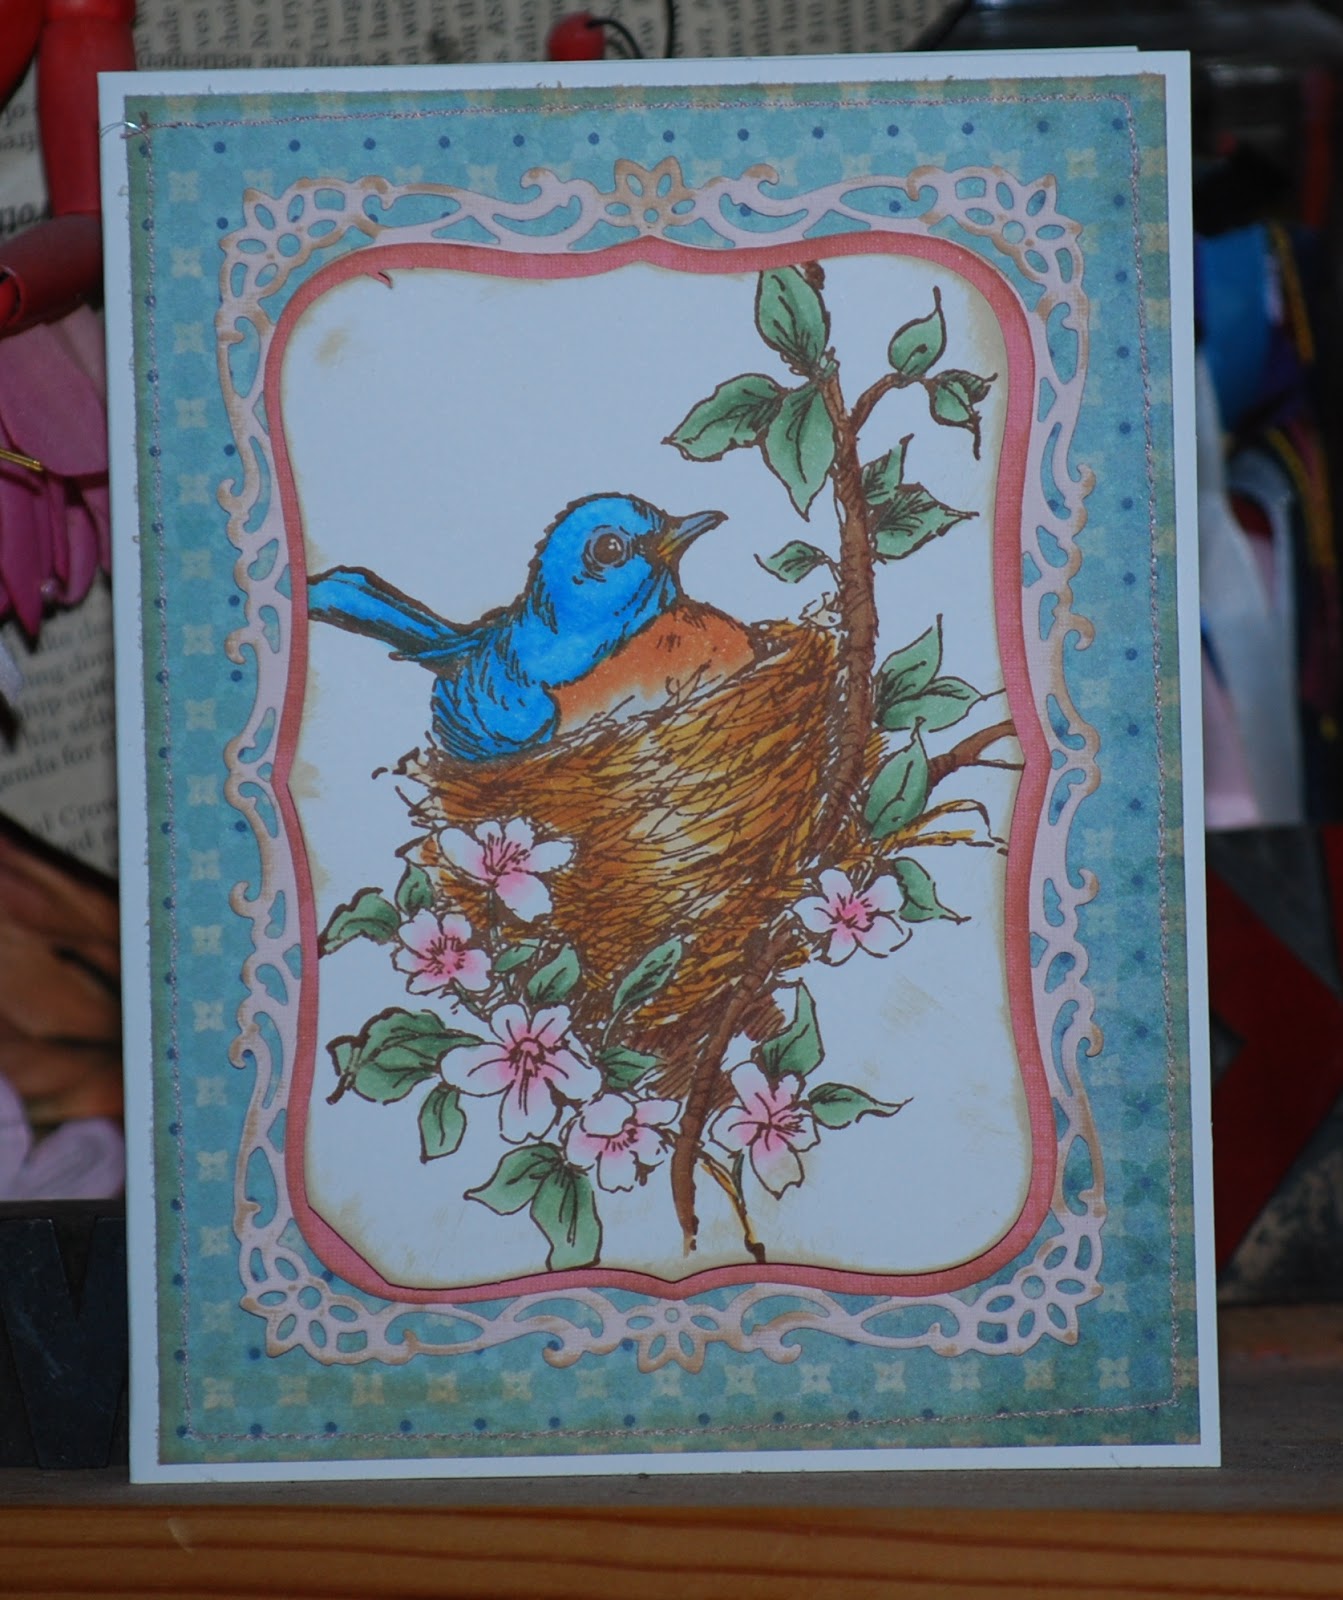
For the colored pencil technique I opted to color a stamp.  When playing around with my pencils a while back I found that you can soften them with baby oil.  How cool is that??!  Here's one of the stamped images I colored and what it looks like softened.


This is the finished product.  Not my favorite card ever but I think I can live with it.  It has banners and brads.  Used colored pencils and is a baby theme so I successfully completed the challenge.


If you're feeling up to it, I'd love to see your take on my challenge pull.  Post links so I can go check it out.  If you do play along, the "blog hop" challenge can use any challenge from any blog you follow.  Please make sure to give links for that too.  I'd love to find more blogs to check out.

Have a fabu day!

P.S.  My pics are not very pretty.  I'd like to find a photography class to take to be able to use my camera and do better quickly.  If you know of any, please let me know about them.

Sunday, July 24, 2016

Inspiration & Challenge Jar

I finally did it.  This is something that's been banging around in my head for a really long time now but I've just never taken the time to do it.  Part of it was figuring out HOW I wanted to do it and also the idea of making all the lists....  Well, even to a professional list maker such as myself, it was a little daunting.  I have no doubt I've missed or forgotten something.  But the good news is that I can always keep adding to the lists and the jar.  To make sure I don't duplicate stuff I went ahead and typed it all up.  I'm hoping that'll save some hassle down the road.

The idea is to have a large variety of ideas or products or challenge themes all mixed up in a jar and pull out 3-5 slips.  Then you have to create a card using just the items or concepts on the slips.  This should be a really neat way to get out of a rut or challenge myself.  Which are two situations I find myself in much to often lately.

I decided to color code my slips.  This will make it easier when I'm pulling them out.  Pink for techniques to use, yellow for products or items to use, orange for challenges and green for theme.  This way I'll pull one green, and however many of the others I want.  If I only want one challenge I'll pull one orange but maybe multiple of the yellow to use several products.

I have one of those super sized pickle jars from ages ago. Until a few minutes ago it had all kinds of strings of beads in it.  Now it's got all kinds of cool 1" by 4 1/4" strips of paper with writing on them in it.  They could go into a smaller jar for sure.  Or any other kind of receptacle for that matter.  It might even be kind of cool to put each color into it's own jar.  But I like the idea of being able to put my hand in and swirl them all around until I pick one.

I made sure to make extras of each color so it'll be fast and easy to add more as ideas come to me.   Inspiration & Challenge Jar list    I'm not thrilled with the way Google Docs changed this up but it's still at least got all the items noted.

I think I'll probably also decorate the jar at some point but for now, I'm pretty happy to have finally gotten this much done.  If you've got suggestions for the list or easy decorating ideas send them along!

Have a fab day!


Tuesday, January 12, 2016

Getting Punny.... Part 1

I had a whole other blog post planned but have decided to save it for another day.  :)

Instead I wanted to share the punny valentine's I've made recently.  They'll all be up in my Etsy shop but I wanted to be able to giggle over them with friends.  Since there are so many I'm going to break them up into different "parts".  Hope you get a giggle out of them too.

This group features the sentiment "You're so deer to me."  I had to pair it with the adorable Woodland Deer from Spellbinders.  I die cut, embossed and stenciled it and in the top card I added Sugar Sparkly Fluff to the white on the deer's tail and belly.  It's also been featured with several other die cuts - seems like these woodland animals MUST have that little bit of grass with them.  And I just had to use that Woodgrain die cut - so stinkin' cool!  The whole herd was lifted off the page with foam dots to give them extra emphasis.


These next two were inspired by an adorable card I found on Pinterest.  Here's the link to her original post.  I didn't want to copy it exactly so I let the inspiration percolate just a bit.  And of course song lyrics and movie quotes came to me!  With that I knew exactly what I wanted to do.  Die cut heart shapes and then die cut the die cut hearts (say that 3 times fast!) with a puzzle piece die.  Wah-lla!  Any one able to name the movie and song or artist these two reference?
This last one isn't very punny but I really dig it.  The original card has been pinned for a long time and there's so much about it I like.  The white on white of the front, the circles with hearts cut out and then popped up, the simplicity but totally cool style of it.  For this version, I have NO doubt there will be others!, I opted to focus on the white on white and the circle theme.  It's difficult to tell in this scan (I'm working on getting my photo booth set up and it can't happen soon enough!) but the white interlocking circles are actually popped up off of the card front.  A stamp and a die cut heart finish it off.
Hope you like these.  And if you've got any favorite puns share them!  I'm always looking for inspiration!


Tuesday, December 29, 2015

Sharing my craft room

One of my favorite time wasters  things to do is to look at all the things on Pinterest. One of my favorite things to look for/at are craft rooms and all the fun, creative, unique storage and organizing options and designs.

Long before there even WAS a Pinterest, I was doing the same thing in all the scrappy magazines.  I even created a layout about it.  Anyone remember this ad?
I already had a mental list of a number of things that were mandatory as you can see from my list.  It's interesting how so many of those things actually stayed consistent over time.  
Here's the whole layout.
I even heard about a contest for a room makeover and decided to try to enter it. And being the crafty soul that I am, I figured that an album would be much better as an entry than a simple essay.  And I'm sure it would have been.  If I'd've finished it and sent it in.

I'm not much of a country fan but I gotta say there may just be something to Garth Brooks' assertion that "sometimes God's greatest gift is unanswered prayers".  If I'd've finished that album it would have been sent in to the contest and I wouldn't have it as one of my favorite mini albums today.  It documents all the things I wanted and then, how I accomplished them.  Much better than having some celeb designer with no real clue about crafting doing it.  Here's a link to the album - My Favorite Room.
 
For one time in my very impatient life, I managed to do prep work.  I still have the folder with my lists, pictures and hand drawn plans.  If you'd like a good giggle, click on the link and you can check 'em out.  Despite this proof that prep work pays off, I still don't do well getting it done.  And the proof that it pays off is that the vast majority of my room is still just like it was originally planned out.  There have been a few adjustments or changes but not a huge amount considering this was done in December 2007.

Here are a few of my favorite spots in my room with commentary.

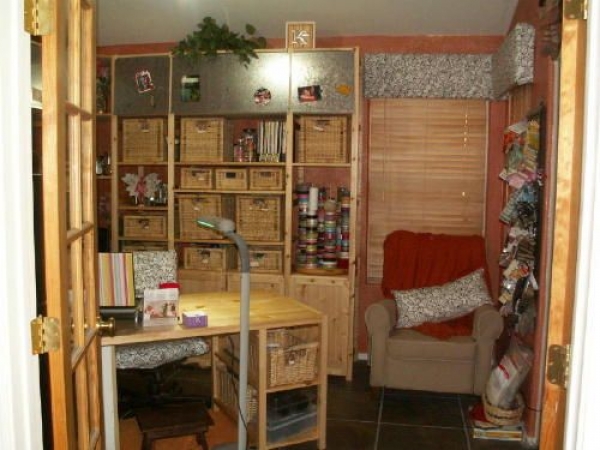
This is a look into the room, circa 2007, from the French doors.  I was so delighted to be able to include a comfy chair for Mel to sit in.  Little did I know it actually ended up having Harley in it much more than any homo sapien's behind.  You can just see the ribbon turn table that I made and additional ribbon on the pegboard.  The desk is now straight, facing forward.  It was just easier to get around once I moved it.
This looks into the corner.  The top doors are magnet and are pretty well completely covered by now with all kinds of things that make me happy.  And my poor desk has never, no exaggeration, been this clean since.  One of the coolest updates has happened to the desk.  Mel added a drop leaf to the end. This has been a HUGE help when I've got a lot of stuff I want to play with and need more room. Best of all, I can put it down when I don't want it taking up the extra space. The link shows it in white but it's actually a similar color to the desk.  Super win!
Here's an updated view with the drop leaf extended.  You can also see the super cool round, spinning organizer I got from Harbor Freight.  I highly recommend it.  A little bit of a pain to put together but well worth the time and effort once you're done.  You can also see the framed photo of Harley in his chair looking down on me and Davis.

You can also see a few of the small changes that have happened.  I added dowel ribbon storage to the side of the unit near the chair and a super cute new polka dot rug.
My die cut center is soooooooo awesome!  Having a space to keep all my dies in one place with my machine, heaven!  After changing how I do things this past year I decided to change it slightly.  Here's the original, right across from my desk
And now once it was moved to the right side wall.  Much easier and quicker for me.  Plus an added bonus is it's literally right next to my scrap storage, which you can just see peeking out from underneath the printer.  This past year I also finally combined all of my dies together.  I used to keep my Spellbinders separate from all the other companies. But I finally figured out that if I'm searching for something specific, like a flower, that it's a whole lot easier to look in ONE spot than two.  The top shelf has all my shape dies in Crop N Style PSB binders.  Those things are rarer than hen's teeth!  So if you've got some you want to part with let me know!!!  The bottom shelf has my alphabet dies and embossing folders.  You can see that I left my ink pads on the wall but moved my stamps with the unit that moved.  This was for several reasons, the biggest one was that I tend to use my stamp pads more than my stamps so keeping them closer to hand will make grabbing them that much faster and easier.

This little spot has actually changed the most.  I've added a shelf and more baskets, as you can see to the left in the photo above.  One of my favorite things is the wine bottle pen holders.  So much storage taking up so little space and leaving so much space to put plenty under them.  My big perpetual calendar has been retired.  Or more aptly, hidden. Hopefully one day I'll be able to find a spot for it again.

If you'd like to see more pictures from my office, follow this link.  I've got folders breaking down specific things as far as my room and organization go.  

Do you have an album or layout with images from your craft room?  Or favorite pins for rooms or clever storage and organization solutions?  Please share then with me.  I'm always looking for new ways to waste time, rather new inspiration.  :)



Sunday, December 20, 2015

Sharing some creations

When I was at my last job I created the office birthday cards.  Very often I would search Pinterest for ideas and LOVED pinning images or projects that sparked me and then put my twist on them as I used products from the company to accomplish it.

Here are a few of the Pinterest pins and my take on them with commentary.  I apologize for the photos.  Oddly, I usually forgot to take any pictures of the cards and only remembered when they came across my desk to sign.

This really was one of my very favorites.  The pops of color and simplicity work perfectly together. My version used Spellbinders Birds on a Wire & Sentiments 3 dies

                                       
     Here's the  original post 
                                                                             
This next one was really fun and so stinkin' easy!  I used Sentiments 3 again and pulled out an older set, the Classic Ric Rac Edgeablity dies.  Part of why it was so easy is that I had 2 of the Ric Rac die and used painters tape to hold them together and down to my paper.  That made die cutting plenty of chevrons fast and simple.

Here's the original pin.

I really loved trying to figure out how to create this last card.  My version features Papertrey Ink Friendship Jar Fillers set and the Summer Fillers set.  The really neat details on this card aren't immediately noticeable - the 3 little colored dots are actually perler beads that I melted - here's how - and the large scalloped frame required creative die cutting.  I'll show that at the end. So easy and a great way to get more out of your dies.

This is the original post 

Since I didn't have a scallop die large enough to create the opening size I wanted I had to create my own.  Here's how!

- Cut mat to your finished size to make it easier to line everything up.  This will also help avoid trying to cut narrow margins around your finished "negative" frame.
- Cut your first scallop rectangle with the bottom lined up where you want it.  This photo shows the original big scallop rectangles cut from my cardstock
- Reset the scallop die so that you're actually only cutting a portion of the shape
- Whalla!  You can now make negative frames any size you need! This will work well with squares and rectangles especially.  If they've got a design feature, like the big scallops here, it's super easy to line up for the second time through your machine.  Make sure to keep the pieces you've die cut as they'll work perfectly for another project down the road.


What are some of your favorite pins or Pinterest successes?

Tuesday, July 16, 2013

More Pinterest inspired projects...

I was reluctant to join Pinterest.  I KNEW I'd get hooked.  But I did it anyways.  And I'm definitely addicted.  Between really good recipes, pictures of beautiful people and clothes and the endless variety of DIY projects to be found I can lose myself for days on that site.  I've pinned plenty of things to try myself. Here are a few more cards created from inspiration found there.

 This one was so fun.  I love the textured background, profusion of flowers and just all around happy vibe.
Inspiration

Two versions of the same thing.  One for a work birthday and one for Mel's mom.

Good design is good design and you can change colors, themes or shapes and it still holds up.  There was so much I liked about this one that I stayed pretty true to the original.
Inspiration from Lucy Abrams, pinterst link

Here's the piece that inspired me.  I loved the textures on it, the white on white, the crisp feel and the fun use of die cuts & their negatives. And how well the design would translate to a variety of different themes.
A Consuming Passion blog
If you've gotten addicted to Pinning, please share some of your favorites with me.

Wednesday, June 26, 2013

At long last a return to my blog.....

I haven't' checked the date for my last post but I know it's been a long time.  Life has a way of getting really crazy, busy and getting in the way of all the things I want to do sometimes.

Here are a few updates from me:
- Am no longer teaching classes anywhere.  That was a pretty hard decision to make since I've been sharing my love of all things crafty for over 11 years.
- I've started working out in the real world again.  And I have to say, I'm delighted about it for so many reasons.  I was able to, literally, propose a dream job and suggest I be the one to do it.  I can't thank Spellbinders and all of the people there enough for going along with my idea.
- Lots of things have changed this past year in my derby league.  They've revamped the training and put in place some great organization.  I'm still working hard to get on a team and have hopes to do so in the near future.
- Bret will be moving back in with Mel & I.  This is a good thing and I'm kinda excited about it.  I like that kid.  He'll be going to school full time so that's pretty cool too.

Since I'm no longer teaching I figure I'll be able to share other crafty stuff here.  One of the things I've done recently is offer to create all of the birthday cards for the office.  It just seems wrong, on so many levels, to have store bought cards from a crafting company.  I also still haunt Pinterest on pretty much a regular basis. I love trying things I've pinned and figure this is a good place to show my inspiration pin and my results.

So here goes:
Original Link
One thing I really liked abut this design, besides the fact that it's totally classic, is that you could really change out the leaf shapes on the original with nearly any other shape or design and it still works.  Really, that's one of the hallmarks of classic/good design.  Since this card was for a man, I used the Nautical Frame & Accents from Spellbinders.  This set is discontinued and kind of hard to find.  I got mine from 7KidsCollegeFund.

June was a busy month for birthdays in the office but I don't want to post all of the cards at once.  :)  So check back in a few days for more.

Until then, have a totally fabu day, support local roller derby and love is love.

Friday, February 15, 2013

Stamp & Scrap Fest Classes!!

Sometimes life takes a zig when you thought it was going to zag.  The opportunity to teach at the Stamp & Scrap Fest was one of those kinds of things I'm happy to say.  March 15 & 16 you'll find me in Tucson teaching 3 classes.  Here's a quick overview of the classes:

Friday afternoon - Anything but a Rectangle!  $20
3 unique cards created fast and easy with dies.  One will be a center step card, there will also be a flip flop card and a uniquely shaped card.  As always, I'll have plenty of tips and tricks to share.  Class project samples will be completed soon and I'll have pictures posted here.  If you're not able to join me in Tucson but are interested in these projects I'll happily mail a kit out to you or bring it to a class in town.

Saturday morning - Mixed Media Mini  $30
This 2" mini album will feature the new Media Mixage blanks from Spellbinders.  There will be plenty of ink, paint and stampy goodness to go around.  Not to mention paper, texture and more.  This one is gonna be super cute and perfect to hang off your purse or other prominent show and tell kind of spot.

Saturday afternoon - Create Waterfall Album  $25
Mini's are always fun but this one celebrates the creative in you.  With fun & funky papers from Glitz Designs, this album is packed with plenty of space for photos & journaling.  Add the letters to the end of each page and you have a perfect way to document your hobby and what it means to you.

Products for these projects are on their way to me.  As soon as I can get them in my hot little hands look for lots of photos and more information to be posted.

Thursday, February 14, 2013

She mixed media canvas

Have you ever wanted to decorate your home with art you create yourself?  Or create a one of a kind gift for someone special?  But weren't sure how to start or what the "rules" were?  It's easier than you thing.  Join me for this mixed media canvas project.  Here's my version:
I'll have plenty of ephemera and lots of paint colors for you to play with.  You'll be able to chose from a variety of fabric and embellishments to adorn your art work.  Feel free to bring any special trinkets you'd like to include.

This class will be March 9 at 1:30 at Scrapbook Barn.  Please call them to sign up. (480) 503-2475  Space is limited.

Wednesday, February 13, 2013

March classes

After some wonderful feed back - thanks again Nancy & Norah! - I've chosen to make a few changes to the card classes at Scrapbook Barn.  We'll still color and create cards with lots of techniques but we'll focus on one main image each month.  I've already got sketches and ideas for March, April & May!!  I'm rarely that far ahead.  This makes me think that this change is a good one if it's got my creativity kicked up into overdrive like this.  I'm anxiously awaiting the arrival of all the stamps from Impression Obsession.  As soon as they land in my mailbox I'll start stamping, inking, coloring and cutting up a storm to create the March projects and then I'll get them posted.  In the meantime, here are the images I'll be highlighting in March.  Enjoy!


You'll be able to purchase these items and special order lots more at Scrapbook Barn in March.

Thursday, January 31, 2013

Cards 2 & Cards 3

Creating cards with the same images but using different techniques has been a lot of fun.  I, only recently, have been comfortable calling myself a stamper.  I started off as a scrapbooker.  I played with paper, glue and photos.  I told many people that I already had one expensive hobby, I didn't need another one.  And then someone showed me hear embossing.  And Copic markers came along.  And I'm now fully hooked on stamping and all the techniques you can use with them.  Here are the samples using just one of the images:
 This is the Cards 1 sample.  The image is straight colored and stands up beautifully as a focal point.
The Cards 2 sample has select portions of the image colored and then highlighted with embossing powder.  Same image but completely different look.
Cards 3.  This one might be my favorite.  Not only is it stamped on patterned paper which instantly makes it look totally different but it's colored and then has small touches of gold foil/leaf added to it.

I used pretty much the same colors on all three images but look at how different they look.  And the different "vibe" each of them has just based on the way it is featured on the card and the colors surrounding them.

To further highlight how versatile stamps really are, I'll be creating layouts and other non-card projects with these images.  I'd love to hear what you think of these projects so drop me a note.

Have a fabulous day!

Thursday, October 18, 2012

It's Hip to be Square!!

I was asked to participate in a "Hip to be Square" blog event hosted by Lisa Swift, Remember The Good Times.  I was so delighted by this because it gave me just the push I needed to create a layout using my "handmade/stitched" paper.  All the details of my "handmade/stitched" paper can be found here.

Here's the layout.  I'll share some details about it after the photos.
Because my background paper was so busy I wanted to make sure my photo was large enough to not be overwhelmed.  I also tried to keep the embellishments to a minimum so the focus stayed with the photo.  This is a favorite of mine from the Friday night, casual get together we had.  Julie, on the left, Kelly, on the right, and I were like the three musketeers in high school.  Constantly at each other's house, wearing each other's clothes and just generally having a good time together.  This picture reminds me of that.
I created a tag to put my journaling on.  I hadn't quite decided what I wanted to say yet so it's still blank.  The tag slides in behind the photo to the backside of the layout.  This is for several reasons: 1) I didn't decide I wanted to add a tag until after I'd already adhered the photo down and 2) it was the only place or way left to add a tag after I'd adhered the photo.

Here's how I did it:  - lick and close my envelope
- measured the width of the envelope on the front of the layout and used a craft knife to cut a slit just a little bit larger
- trim off a portion of the envelope so it was as long as I wanted
- adhere the envelope on back of layout so the open end lines up with the slit in the layout
- to make sure there was additional strength as well as to make sure there wouldn't be any issues when taking out & inserting my tag I also added some scotch tape near the slit and on the sides.
- I also made my tag out of chipboard for extra sturdiness

If you'd like to see more "handmade/stitched paper" check out my blog post on Oct 16.

Supplies: Crate Paper 6x6 Paper Heart Collection pad, Core'dinations cardstock, Making Memories rub ons, Heidi Grace designs/Fiskars paper flower W/ brad, 7 Gypsies chipboard letters, Spellbinders dies for labels, washi tape unknown, Ranger TH Distress Ink

Tuesday, October 16, 2012

More Handmade Paper

After creating my own paper in July it took me awhile to finally make some more.  Paste Eaters was a perfect chance to play.  I went crazy with patterns and colors and my scraps.  I ended up creating 8 more papers!  I can't decide which one I like best!  What do you think??
 I can't decide if I like this one better horizontally or vertical!
 Fun color combo - could be perfect for a Kaytey layout.
 The gingham square wasn't necessary but I liked how it looked.  I also stitched around the butterfly top panel with silver thread.
 Rich colors with dots & stripes.  What's not to love?!
 I'll have to find a fall photo to use on this.  It just screams fall to me.
 More stripes and dots but in a different configuration.
 Pink & red.  Maybe a layout with me & Kaytey since these are our favorite colors.
This one was the most time consuming as each piece was needed to create the full 12x12.  I enjoyed playing with the blue, green, orange with a little bit of yellow color palett.