Sunday, October 7, 2012

More But Less. If you know what I mean.

I've been thinking that perhaps more but smaller posts might solve some of the difficulty I've been having getting to my blog.  So in with that theory in mind here's a short missive for today.

It's been busy long weekend and it isn't over yet.  With the possibility of my brother being in the area (ok, within 3 hours of here) and long time friends under our roof, I haven't been able to skate but the fun and laughter and good food has been worth it.  With all of that I still managed to get a couple of creative things done.

I've had a plain white t-shirt hanging out on the back of my sewing machine chair for a very long time.  I've had plans and ideas for it but just hadn't gotten around to them.  For some reason, yesterday was the day.  It's not completely finished, I want to add my skate name and number on the back but thought the front was still cute enough to share.
Back in January when I was at Downtown Disney I saw the cutest shirt.  That was, until I saw the price tag.  $68!!  For a t-shirt??!  I promptly took a picture, which I can no longer find, and figured I'd make one myself.  So with only a sketchy memory & finally having figured out the easiest way to do what I wanted, here are my results.
My super secret, ridiculously easy & totally re-createable method for making this cute skull & cross bones??  Kaisercraft's Skull album!!!  I traced it on the back side of my fabric, cut it out, pinned it down and sewed around it!  A few details on this - after stitching around the left eye a couple of times I carefully cut the grey jersey out so I got a color contrast; I stitched back & forth and all around for the little nose space; the skull & cross bones are one piece, I just stitched them independently to give the look of separate pieces & the heart was stitched using silver thread for a little interest.  I'm debating adding a bow of some kind.

The other creative project is due to Jackie Smith!!  Jackie regularly takes my Coloring Class at Scrapbook Barn and had told me about a sweet little Patchwork Santa image.  I'd asked her to bring them to the next class so I could look at them and perhaps feature them.  She surprised me by sending me an envelope PACKED with beautiful stamps.  As soon as I saw the Santa she'd mentioned I HAD to start coloring!  This is one I colored on a little and then walked away from.  And came back to and colored on some more and so on.  It was just so detailed and intricate that I needed time to let the colors blend and dry and to let me decide what I wanted to do next.  I have no idea yet what the card he'll be featured on will look like but I think it's likely to be simple to let the image & coloring really stand out.
What have you been up to?  And how do you think this image should be displayed?

Tuesday, October 2, 2012

October update

I'll be mailing out the class samples for Scrapbook Barn in the morning.  Take a peek at them on the Class Projects tab.  I was totally inspired by a stamp set I picked up while on a trip to Atlanta.  I got to go check out the cutest little shop, The Altered Angel.  I highly recommend stopping in if you're in the area.

Looking forward to having some friends in town for a few days the end of the week.  And hope to be able to see my brother on his next trip thru AZ.  And catching up on all the little things that haven't gotten done since our California trip.


Wednesday, September 5, 2012

Updates - Classes, life, stuff

It's been way to long since I added anything to my poor little blog.  It's not for lack of stuff going on but more because SO MUCH has been going on.  Just doesn't seem like there's been time to catch my breath or gather my thoughts with it all.  So I hope you'll understand and forgive me.  Sometimes life just gets in the way and won't let loose.

First off, classes.  I made one of the most difficult decisions I've had to deal with in a long time in the last month or so.  I'm taking a break from teaching, at least until after the Winter CHA show.  Because I can't give it up completely - I've been teaching in some capacity for the last 10 years! - I will continue the Copic Color Inspirations classes at Scrapbook Barn.  Creating and kitting for one class is more manageable and hopefully lets some of my creative mojo to work more freely than it has been.  I'm looking forward to creating just for fun for a little bit.

Next, class samples for September's class at Scrapbook Barn.  I've got 3 of the projects completed and the 4th nearly so.  I'll be dropping them in the mail from Georgia, that's the next major thing I'll mention below, today.  Pictures will be posted to the Class Projects tab as usual with the colors used and any interesting technique information we'll be doing on them.

Lastly,  my best friend from high school was recently diagnosed with a form of Leukemia.  I'm in Georgia for a week to help her and her family out.  It's kind of thrown everyone for a loop, me included, so huddling together seems to be the best way to fend off the beasties.

And in the midst of everything, derby still takes up about 4 nights a week.  I can't even begin to say how grateful I am to have that kind of outlet.  Between being able to get my mind off of stuff or being able to go out and work out hard, and perhaps even hit a few bitches, it's been a blessing.  I participated in a Co-Ed Scrimmage Fun Day on the first and had so much fun.  Bret surprised me by showing up for my bout.  Poor kid didn't even blink an eye seeing his mom wearing a thong over her shorts.  To be fair - the bout was Granny Panties vs. Thongs.  I had so much fun!  And I'm happy to say that I mostly played better than the last scrimmage day event I participated in AND I didn't break anything!!  Major win if you ask me.

Thursday, August 16, 2012

Somebody's gotta win.... why not me??

If you haven't been able to get your hands onto some of the amazing Simple Stories products, I'm sorry.  It's such amazing product.  Here in AZ you can find it at Scraps of Love - tell Chris I sent you and you can find it in Payson at Paper & Metal Scrappers - again let the ladies know I sent you.  If you know of another store that has it PLEASE let me know.  I'll visit to snatch some up & let them know you told me about it.

As to the title of my post - Simple Stories has a new product line called Snap.  It's just as amazing as their original but with a fresh, bright, cleaner look and tons of versatility.  Their giving away a beautiful bunch of goodies and I'd love to be one of the winners.  :)  So check out their adorable video on Snap.


Saturday, July 21, 2012

August projects at Scrapbook Barn

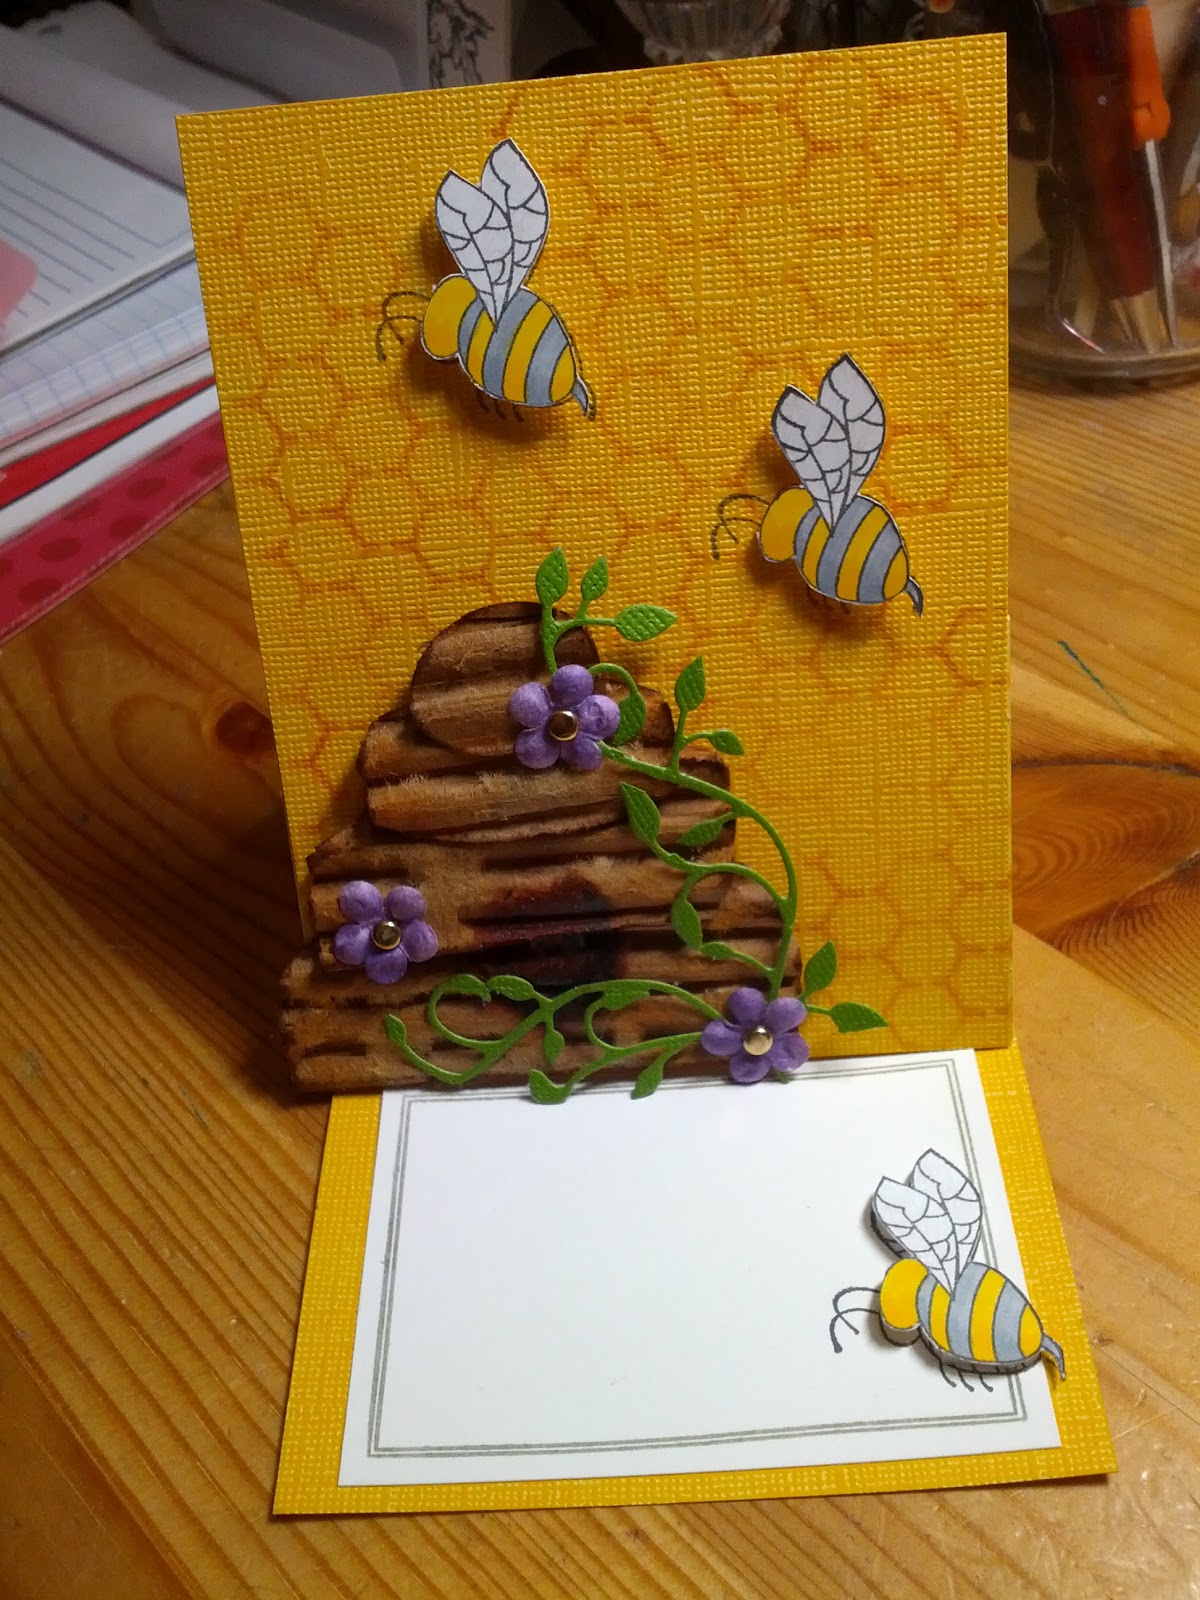
One thing I've been thinking about lately is the desire to do more interesting or unique folds or shapes in class each month.  Starting in August I'm going to make sure at least one project of the four is not your typical A2 or A7 card.  To start this off, I chose to create an easel style fold up card.  The whole idea exploded in my brain right at the end of class in July.  :)  
The majority of our "coloring" on this one will come from the airbrushing techniques we'll use.  Expect to take a little time on the assembly. 

You can see a closer view of the card front on the Class Projects tab.  You'll also see the 3 other projects for August.  We've got a good mix of quick and easy coloring & card making and more involved assembly and coloring.  I hope to see you on August 21. 

Tuesday, July 3, 2012

Creating my own paper....

Recently Paper Vineyard had a sidewalk sale that I was able to poke thru before class.  I found a 6x6 Crate Paper paper pad buried in the stacks of 12x12 clearance paper.  Of course I had to scoop it up.  I had no idea what I'd use it for but with so many cute patterns I was sure I could figure something out.
Just as I was drifting off to sleep after getting it home I had an idea.  As quickly as I could - once I woke up of course - I had to try it.

While I create plenty of cards and love to do mini books, I've found a renewed interest in creating 12x12 layouts - thanks to the Sketch class I'm teaching.  I've managed to get several wedding layouts done - I mean, it's only been 10 years since we renewed our vows with a ceremony - as well as layouts about my sister's wedding, a vacation to Puerto Penasco and more.  So what was I going to do with 6x6 paper?  How about make my own 12x12??
I love to sew on paper.  So I sewed 4 sheets of the 6x6 together.  I opted to use four different patterns but imagine if I'd done 4 of the same?  The red on red polka dot with pink stitching to hold it all together??  Or that floral?  I'm starting to wish I'd found more than one of these little babies!
To make the stitching easier to do, I flipped the papers over and used a little bit of Scotch tape to hold them together.  Then some quick zig zag stitching where they all meet up.
I also added a straight border stitch.  But am thinking that a nice wavy, free motion kind of stitch in two passes would have been pretty neat too.

I'm now thinking of all kinds of ways to create my own paper using my scrap stash.  Long 12" strips in varying widths all stitched together.  Different sizes of squares and rectangles.  What about those sheets of cardstock where I've only used a portion of it?  I've got plenty of 12xsomething sheets in my stash.  I could easily find papers to add to them to create a full 12x12 again.

And because my background paper is so busy interesting, I'm not going to need a ton of embellishments or other products.  Or maybe, with a nice big photo I can load up on the embellishments.  I'll have to try it both ways!

I'd love to see your variations of this technique!  Leave a comment with a link to a blog post or photo site so I can see them.  Join the creative journey!

Tuesday, June 26, 2012

Guitar card & class updates

Have you been to Pinterest?  If you've managed to avoid that time sucking, food filled, crafty project overloaded addiction, you're lucky!!!  I, however, am totally, completely and utterly stuck.  Kinda like Br'er Rabbit and the tar baby!  One of the projects I pinned was a really adorable guitar card.  
I knew I'd want to recreate it for Mel.  However.  When I read that not one, but both, of the ladies that had done this card previously had drawn their image free hand I knew I was in trouble.  And the more I thought about it, I wanted to do an acoustic guitar.  Here's how I solved my conundrum.  :)
I'm a PowerPoint girl.  I just have never figured out how to do stuff in Word and I like the flexibility I've got in PP.  I opened a new document and "drew" a 5x7 box on the page.  I take the fill color out to make it easier to see.   I found an image - clip art or real, either will work fine - online of an acoustic guitar I liked and copied it.  I pasted that to my power point doc and moved it around and resized it so that I got just the portion of the guitar in the 5x7 space that I wanted.  Hit print and grabbed my fussy cutting tools - a craft knife with a new blade and my glass mat.  I first cut around the guitar shape inside the blue rectangle and then cut along the blue lines at the top, bottom and on the left side.  That gave me a shape to trace onto the front of my card base.  I also used it to trace the shape onto wood paper - I KNEW I'd be able to find a cool way to use it when I bought it!  When tracing make sure you trace onto the BACK of your chosen material and flip your image or letter so that you're looking at the wrong side as you trace it.  This way you can cut it out and not have to deal with erasing any stray marks.

I then cut out each of the "shapes" inside that template - the hole, the part of the neck showing, the bridge & the pick guard - out.  I used each of those to trace onto different papers to give me texture and color and cut them out.  I inserted 6 small silver brads into the bridge and the strung silver thread from each of them up to the neck and taping the thread behind the neck.  All in all, pretty simple and straight forward but I really like how it turned out.
To get the mottled look for the pick guard I used Core'dinations paper and sanded it since I don't think I've even ever seen tortises shell look paper.

I've updated the Class Projects page.  A few photos will be added soon.  I managed to mail out samples to two stores with out taking pictures or scanning them in a flurry of marking stuff of my to do list and cleaning off me desk.  :(